

Flake flooring creates a seamless, durable finish, but it’s all about the process. Below is a simple breakdown of how to install flake flooring and what you need to get it right from the start.
Applying flake flooring isn’t just about following steps, it’s about understanding the materials, knowing how they work together, and building the confidence to deliver a flawless finish.
To get the best results, having the right tools on hand makes all the difference. During training, we’ll walk you through how and when to use them.
A successful flake floor starts with a clean, sound surface.
Tip: Poor prep is the most common cause of coating failure.
Once the surface is ready:
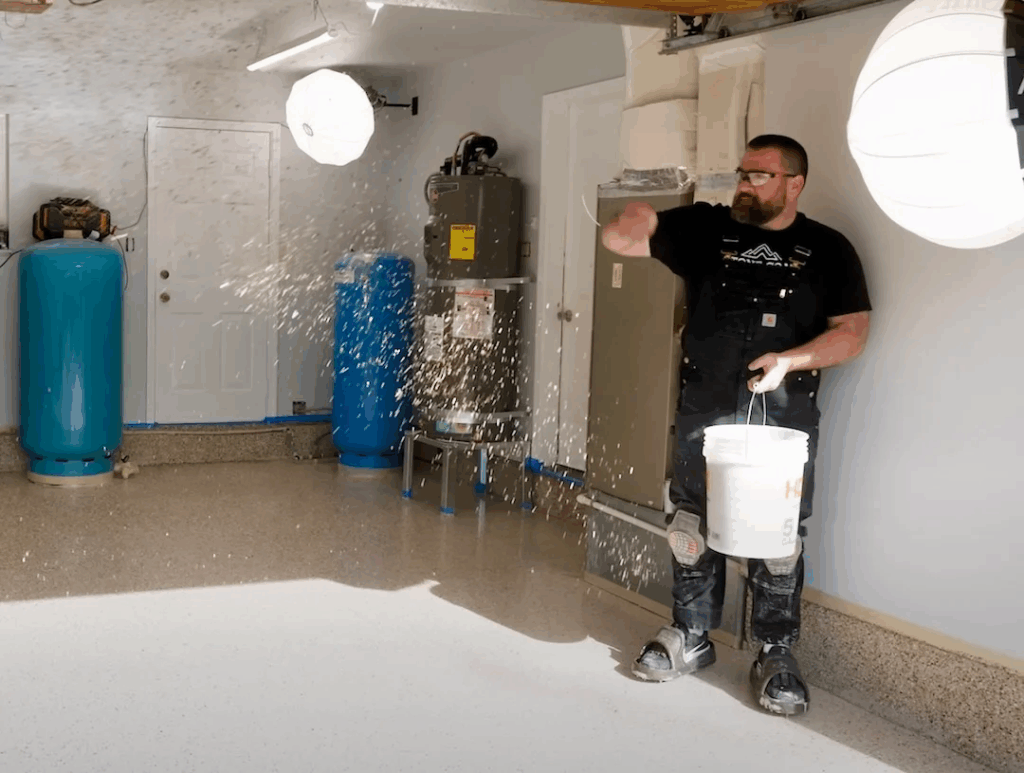
Tip: Timing is everything. Flakes must go down while the base coat is still tacky, not too wet, not too dry.
We’ll guide you on technique, motion, and even how to walk with spike shoes.
For the Natural Stone Range, use a shaking motion with your fingers to layer the flake mix for an even distribution.
You’ll learn when and how to de-flake the surface correctly before sealing.
Don’t rush this part. Use a floor scraper to knock down sharp flakes, then vacuum thoroughly to ensure a smooth topcoat finish.
We’ll help you select and apply the right topcoat for your job.
Tip: Use a UV-stable or polyaspartic topcoat for outdoor or high-traffic areas. Always check coverage and recoat windows.
We offer professional training and support for applicators looking to learn the Designer Flake system properly.
Absolutely! We welcome all orders and make it easy for you to get exactly what you need. To place an order with Designer Flake, simply select your preferred flakes from our range below. You have two options: order our $4.95 sampler to experience the exact look and feel of your chosen flakes before committing to a larger purchase, or skip the sample and request an instant quote based on the area you’re planning to work on. Both options ensure you get the right flakes for your specific project needs.
Yes! Samples are available for $4.95 at checkout. When you order a sample, you’ll receive a swatch of your chosen flake delivered to your address. Get as many samples as you want to be sure with what you want to order – customers cover the freight cost, so you can see and feel the exact texture and appearance before making your final decision.
Yes, we can create custom colours to match your specific requirements. Simply submit a request through our enquiry form with details about the colour you need, and our team will contact you to discuss your custom flake design options. We’ll work with you to ensure we achieve the perfect colour match for your project.
Getting a quote from Designer Flake is simple and completely free. Just enter the total area you need to cover (in square metres) for your project, then click ‘Get a Quote’ on your chosen flake. Your quote will appear in the checkout cart where you can review the details and submit your information – you won’t be charged anything for requesting a quote. Our team will then provide you with a detailed quotation for your Designer Flake project.
While it’s possible to install flake flooring yourself, professional installation is strongly recommended for best results. Flake flooring requires proper surface preparation, precise mixing ratios, and specific application techniques to achieve a durable, even finish. Without the right tools and experience, DIY installation can result in uneven coverage, adhesion issues, or premature wear. For the best outcome and to protect your investment, we recommend working with experienced professionals who understand the intricacies of flake flooring systems.
Floors, feature walls, bench tops, garages bathrooms in homes, businesses and commercial sites.
Whether you’re just browsing or ready to order, we’re here to help.
Reach out, ask a question, or take a closer look at our flakes.
Copyright 2026 ©